ONE-MA3 – Searching for Egyptian Blue and Creating Our Own

By Naomi Lutz ’22
We first learned about Egyptian Blue the first week in Sermoneta when we used the pigment to make our frescoes. We knew little about it other than that it was the first synthetic pigment, created and used by Egyptians. Later in Terracina, we learned about VIL, which can be used to detect very small particles of Egyptian Blue. We used VIL on a mosaic in Terracina but did not find any Egyptian Blue. The TAs told us that we would probably be able to actually find some in the Egyptian Museum in Turin.
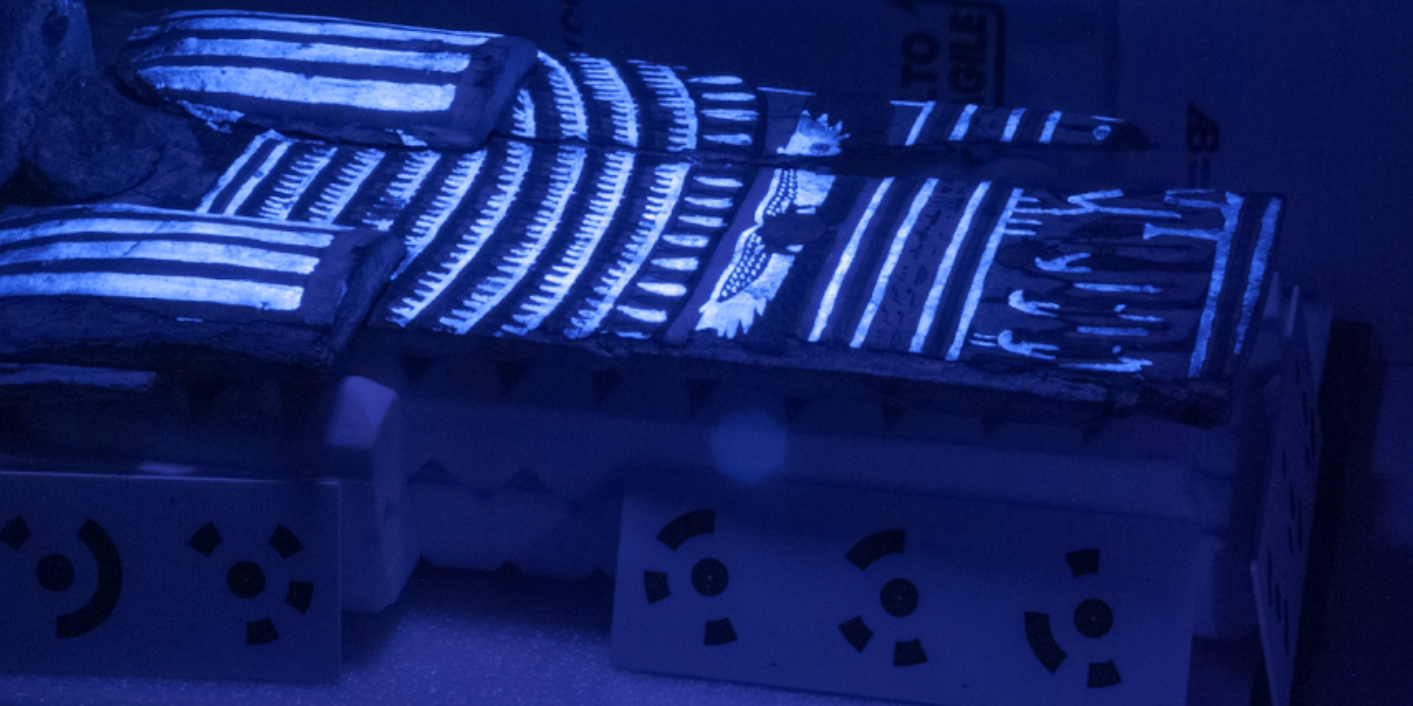
In the museum in Turin, each group was assigned an artifact to analyze and use VIL on. Although the pigment had faded to a black color, we were immediately able to clearly detect it. To block out other sources of infrared light, we held up cardboard boxes around the object. Shining a bright LED light onto the object, we took pictures using the modified camera, and the areas of the artifact where Egyptian Blue was used, showed up bright blue on the photos. My group analyzed a sarcophagus, and our goal was to simultaneously take pictures to make both a VIL 3D model and a regular photogrammetry model. The VIL pictures were still super cool and showed that a lot of Egyptian Blue had been used on the sarcophagus and on the other artifacts!

Egyptian blue glowing on the Sarcophagus using VIL
Our TA Max walked around the museum and took pictures of many different artifacts and found Egyptian Blue basically everywhere! He made a presentation of the different images, and we were all so impressed. We had never seen so much Egyptian Blue in our lives. It was really exciting to see so much of it after having heard so much about it earlier in the trip. It was even more exciting to actually get to make the pigment a few days later in Aramengo.

Meriah Gannon ’22 preparing our mixture in the Nicola Restori Laboratory [Photo by: Carene Umubyeyi ’22]
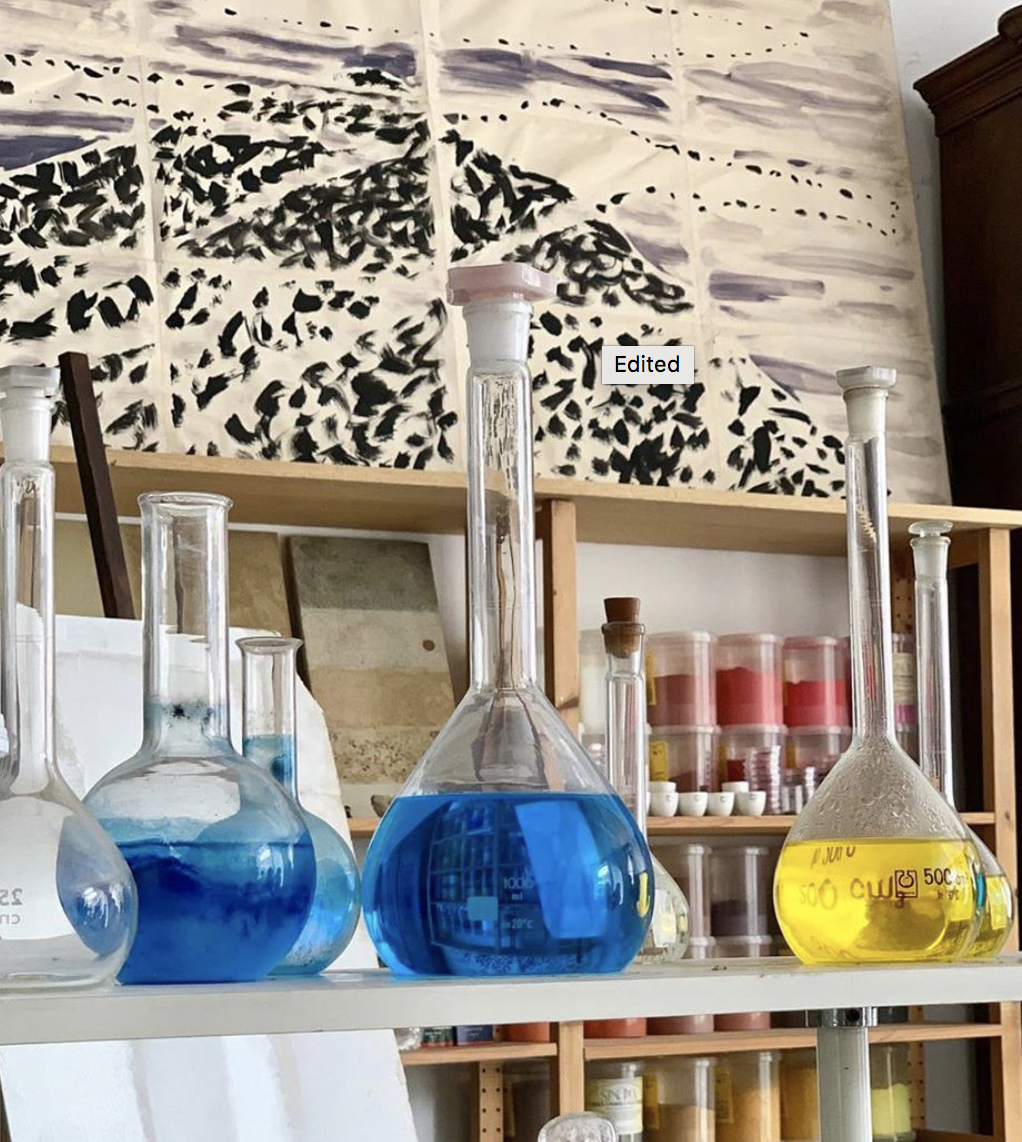
Our TA’s Max and Linda presented a lecture about the production of Egyptian Blue, since Max did his ONE-MA^3 project on Egyptian Blue and continued his research in the Masic Lab. His group found that precise measurements and fine particles were important in successfully creating the pigment. We used his advice when making our own Egyptian Blue this afternoon in Aramengo at the Nicola Restori Laboratory. Chemist, Marco Nicola, instructed each group to make 5 grams of the pigment. The three main ingredients are copper, calcium, and silica. The groups were given different variations of copper and calcium solutions to use in their recipes. The first step was using stoichiometry to figure out how many grams of each solution/powder containing copper, calcium, and silica to put into the mixture. After thinking through and writing out all of the conversions, we were ready to measure and weigh our ingredients. My group tried to get within the thousandth place for each of the three ingredients with the goal of being as precise as possible. We then grinded the powders together, making the mixture very fine. We added water to half of our powder and rolled it up into a ball, leaving the other half in its container.

Ben Bartschi ’22 measuring out an ingredient for Egyptian blue [Photo by: Carene Umubyeyi ’22]
Marco heated up or cooked our Egyptian Blue, and we all went back the next day to test our creations. They all looked somewhat blue, which was encouraging. Using VIL, we saw that all the samples luminesced. Some did more than others, and Marco declared the one that luminesced the most to be the winner. After our introduction to and study of Egyptian Blue in Italy, some of our class will continue to research Egyptian Blue in the fall at MIT.

Solutions in the Laboratory [Photo by: Carene Umubyeyi ’22]
Share on Bluesky


